To navigate to the Bulk Works Upload section, select your Member account, then from the left-hand menu click the down arrow next to Works Registration. From the options under Works Registration, click Bulk Registration Tool.
You will need to fill out the Bulk Registration template, then upload it into our system.
Click the blue Download Template button on the right. After the document has downloaded, open the file. Save a copy to your computer by selecting Save on your preferred spreadsheet software.
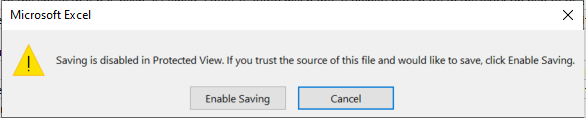
Please note: You will be prompted to Enable Saving in order to save the document to your computer. See example below.
Now that you have saved a version of the template, you can begin editing the document with your works.
Tips For Completing Your Bulk Work Document
Before completing a Bulk Work upload, please note that publishing information should only be entered for shares you control.
Please do not enter publishing and shares information for publishers you do not represent.
Required Fields
Not every column is required – you can tell which are required by the asterisk (*) next to the column title.
However, some columns are dependent – this means if you enter information in one column, you must enter information in its dependent column or you will get an error when you upload. These columns are not required, but both must be filled in if you choose to add this information. These columns are:
- AKA Title and AKA Title Type Code (Columns E and F)
- Administrator Name and Administrator IPI Number (Columns O and P)
- Recording Title and Recording Artist (Columns R and S)
A work title may only appear once per bulk work document.
This means that if a work has multiple writers, they will need to be formatted following the steps below:
- Select a row and completely fill in all necessary columns, including the first writer's information.
- Move to the line below, leave columns A-F blank, and enter the second writer's information starting in column G.
- Continuing adding writers on rows below each other until all writers are entered.
For example:

The work title is entered in cell A2, and the first writer's information is entered in cells G2-J2. Information for the second writer on that same work begins on the row below below, beginning with cell G3. Columns A3-AF are left blank.
Individual Required Field Notes
Writer Role Code (Column J):
If you're unsure of the code to use for your writer role, reference the list with codes and definitions below:- Adaptor (AD): The author or one of the authors of an adapted text of a musical work.
- Arranger (AR): A modifier or musical elements of a musical work.
- Author, Writer, Author of Lyrics (A): The creator or one of the creators of a text of a musical work.
- Composer, Writer (C): The creator or one of the creators of the musical elements of a musical work.
- Composer/Author (CA): The creator or one of the creators of text and musical elements within a musical work.
- Sub Arranger (SR): A creator of arrangements authorized by the Sub-Publisher.
- Sub Author (SA): The author of text which substitutes or modifies an existing text of musical work.
- Translator (TR): A modifier of a text in a different langugage.
- Income Participant (PA): A person that receives royalty payments for a work but is not a copyright owner.
Collection Share field (Column Q):
- You may not enter a zero. If you have zero shares in a work, you do not need to register that work.
Publisher IPI Number (Column M):
- If you are a self-administered songwriter that does not have a publisher IPI, you will not be able to do bulk work upload – you will need to upload works individually.
If you do not know what a column title means or what information to enter for that column, please review the Field Definitions tab at the bottom of the document.
Document Size
There is a maximum of 300 rows for upload. If your document requires more rows than 300, you will need to create another document for upload with those additional rows.
Please note: 300 rows do not equal 300 works. If there are multiple writers on a work, each writer must have their own row, which may mean multiple rows for a single work.Document Format for UploadFor directions on entering multiple writers on a single work, please click here.
The file must save as an .xlxs format to upload.
- If you have an older file format version, you will need to upgrade before uploading the document.
Please note: The columns should not be moved or deleted – they must be in the same location as the template to successfully upload.
Error Messages
If you receive an error message, click the blue Continue button to be taken to the File Review screen. Here you will see which works are ready to submit, and which require attention. You now have a few options:
- If there are only a few errors to resolve: Scroll below in this article to the applicable error message below for information on how to resolve.
- If there are many errors to resolve: We suggest selecting the blue Cancel and Start Over text at the very bottom of your screen to remove your current file, then revising the errors on your document and re-uploading as a new file.
- If you prefer to submit the works that are ready and resolve any works with errors later: Click the Save for Later button in the bottom right section of your screen - this option saves the works with errors to your Registration Drafts. Then you will see the Submit [X] Works button in the lower right corner highlighted – click this button to submit the works without errors.
- Please note: You will need to edit the works saved to your drafts individually later. (Drafts are saved for up to three months.) You can access your Registration Drafts by going to your Member account, then clicking Registration Drafts in the left-hand side under Catalog.
Missing Data Error Message
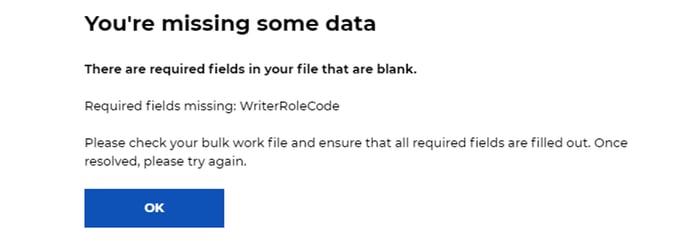
This message means there is some information missing in your file that is required for upload OR there may be a data validation issue (example: too many numbers in an IPI field). Click the blue Continue button to be taken to the File Review screen.
On the File Review screen, you will see the works that need attention in red. Click the blue text that reads Resolve Errors on the right-hand side, and you will be taken to the Work Details page for that work.
A red Error ! icon will show on the right-hand side of a required information section that needs updating, and within that section, the piece of information with an issue will show in red. In the example below, you can see that the Writers section has an error and IPI is in red to indicate that information needs to be fixed.

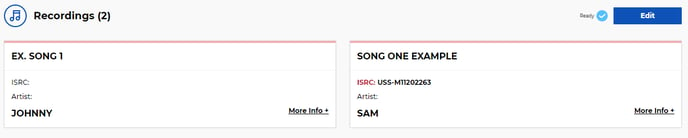
If the data that needs to be resolved is in a field that is not required, it will show a blue Ready icon on the right-hand side, but the information with an issue within the section will show as red, such as the example below with ISRC in red, indicating there is an error with the number.
To resolve an error, click the blue Edit button next to that section. You will be taken to a screen to edit the information from that section. To edit, click the underlined Edit text to make your changes, and a pop-up will appear along the right-hand side of your screen with details. In the pop-up, enter changes in any field you need, then click the blue Edit button at the bottom. Once all edits have been made, click the blue Next button in the bottom right-hand corner.
File is Too Large Error Message
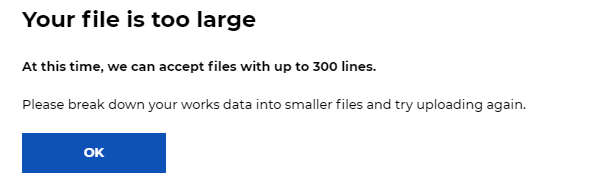
300 rows are the maximum amount of rows that can be accepted on a bulk works document is 300.
Please review the information under File Format in the in the Tips For Completing Your Bulk Upload Document section of this article for more information.